1/4 cup finely chopped cabbage (mix purple and green)
2-3 tbs finely chopped onion
2-3 tbsp tomato
2-3 tbsp chopped bell peppers (mix green ,red ,yellow)
2 bread slices1-2 tsp butter
3-4 tsp Coriander mint chutney (optional)
2 cheese slices
Method
• Gather all your ingredients – sourdough bread slices, coriander-mint chutney, cheese slices, butter, chopped and saluted vegetable like onion, tomato, green&red bell pepper ,green and purple cabbage (use favourite vegetables)
• Take 2 bread slices and apply butter generously all over.
• Now apply mint-coriander chutney on the bread slices.Keep saluted vegetables and spices of cheese . Cover this layer with the 2nd bread, with the chutney side facing up.
• Heat your grill pan on medium heat(You can use sandwich makers also )Apply butter generously on top of both the sandwiches and once the pan is hot, place the sandwiches on the pan with the buttered side facing down.As the sandwich grills from one side, now apply butter on the side facing up.
• Once the 1st side is nice and brown and you see grill lines, flip the sandwich to grill the other side. Press down the sandwiches once in while with a spatula.
Mint pea chutney
Ingredients
2-3 small shallot
1-2tsp butter
1/4 cup mint leaves
1/4 cup green pea(frozen/fresh)
1-2tsp Vinegar(
Pepper(to taste)
Salt
3/4 cup milk(96g)
Method
Take small pan ,put shallot and butter in a small non-stick frypan over low heat sauté until soft .Add the peas and milk and simmer until peas are softened and still bright green. Add mint and blend into a puree. Add vinegar(lime juice)salt and pepper to taste.Your sauce ready to serve.Serve your sandwich with sauce
Step 1:Remove the green part from the watermelon rind. Then cut into small dices .
Step 2:Boil these pieces in a saucepan for about 8-10 minutes or until they turn translucent. Strain it and let them cool down for some time.
Step 3: Make Sugar syrup.Heat 1 cups of water in a pan and add 1/2 cup of sugar to it. Let the sugar melt.
Step 4:When all the sugar has melted, add the diced the watermelon to it and let it boil in sugar syrup for about 5-6 minutes.Let the sugar syrup cool down completely.
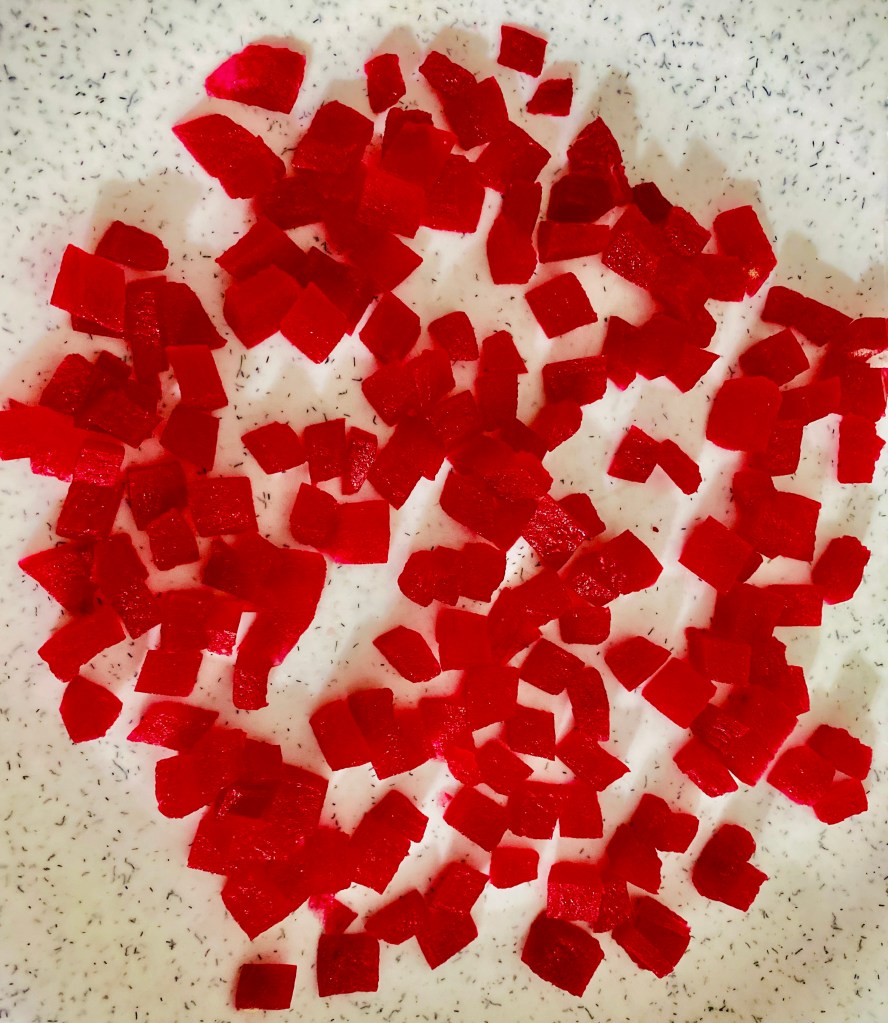
Step 5:Divide the melons into two part-so that we can add colour to it(can use as many colours ) .Add food colour to each part and mix thoroughly.let the melon soak in the sugar syrup about 3-4 hrs .Once it done, strain out the mixture and spread them on the tissue paper.
Step 5:Dry them on a try for around a day in open.(keep them in the sunlight until it dry completely)
Now the tutti frutti ready to use with your bread ,ice cream ,cakes or with pudding.
A doughnut or donut is a type of sweet dessert food. The doughnut is popular in many countries and is prepared in various forms as a sweet snack that can be homemade also.Let see how to make doughnuts…..
Ingredients
7 gm instant dry yeast
3/4 cup lukewarm milk(as needed)
1/4 cup and 1 teaspoon white sugar
1/2 teaspoon salt
water (as needed)
1 eggs
1/4 teaspoon ground nutmeg
2.5 cups all-purpose flour(maida)
2-1/4 cups vegetable oil for frying
3 tablespoons butter
1cup sugar
3/4 teaspoon vanilla
2 tablespoons and 3/4 teaspoon hot water or as needed
Method
•In a large bowl, mix together the yeast ,milk, sugar, salt, eggs, and the flour. Mix the mixture with a wooden spatula.Knead for about 8-10minutes, or until smooth and elastic.
Let the dough rest for •proofing45-50mint.Once it ready,Punch down the dough to release the air.
Roll & cut into doughnuts. Roll the dough out to 1/2 inch thickness. Cut the doughnuts using a cutter.Place doughnuts onto the lined baking sheet, then lightly cover and allow to rest as you prepare •Heat oil in a deep-fryer or large heavy skillet to 180•C.Slide doughnuts into the hot oil using a wide spatula. Turn doughnuts over as they rise to the surface. Fry doughnuts on each side until golden brown. Remove from hot oil, to drain on a wire rack. Dip doughnuts into the glaze while still hot, and set onto wire racks to drain off excess.Decide how you want to serve them as sugared or glazed
Sugar coated doughnut
When the doughnut have cooled roll them in the sugar to coat evenly
Glazed doughnut
Glaze
• 240g confectioners’ sugar
• 1/3 cup heavy cream or whole milk
• 1/2 teaspoon pure vanilla extract
• Whisk all of the glaze ingredients together make glaze.
Dip each warm doughnut into the glaze, making sure to coat both sides. Place back onto prepared rack as excess glaze drips down. Let it rest for 15-20 mint rest.Now your doughnut ready to serve
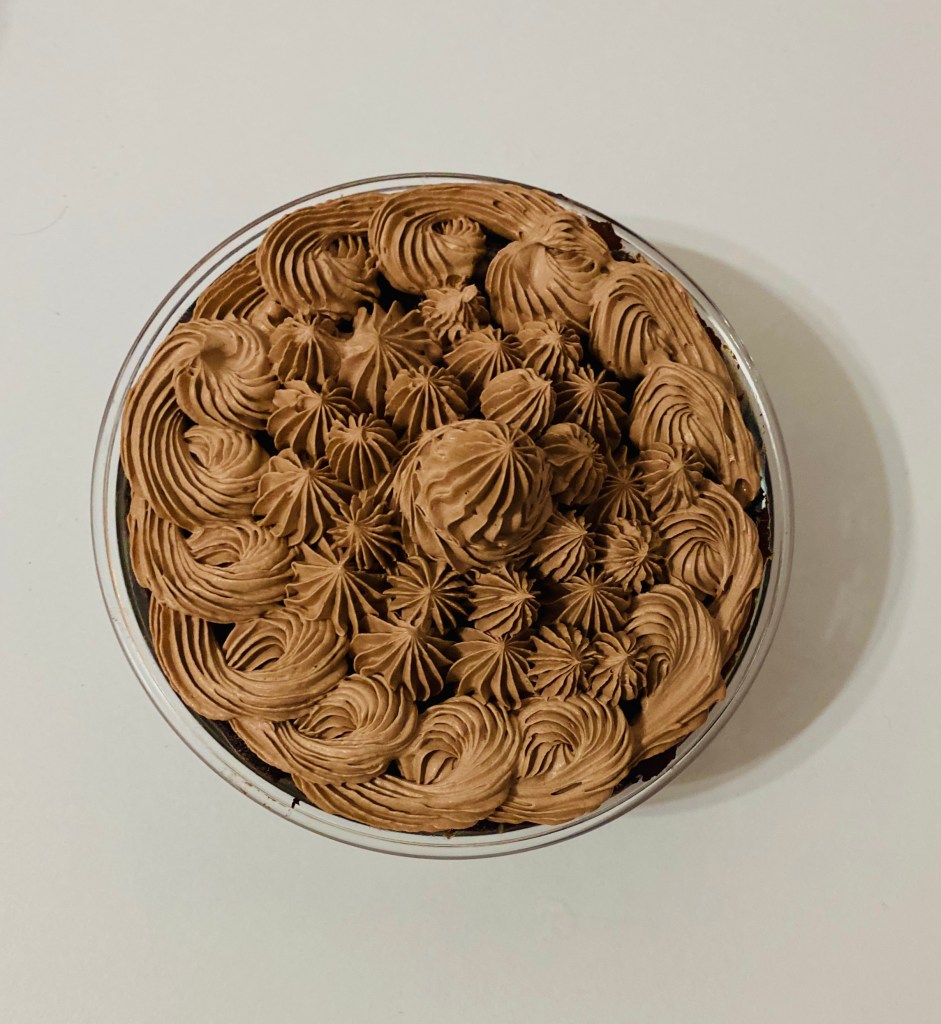
1.Mix flour, sugar, cocoa powder, baking soda, and salt in a large microwave-safe bowl / mug(if you are using mug this ingredients will make two medium size mug cakes)stir in milk, oil, water, and vanilla extract.
2.Cook in microwave until cake is done in the middle, about 2 seconds.Ready to serve.
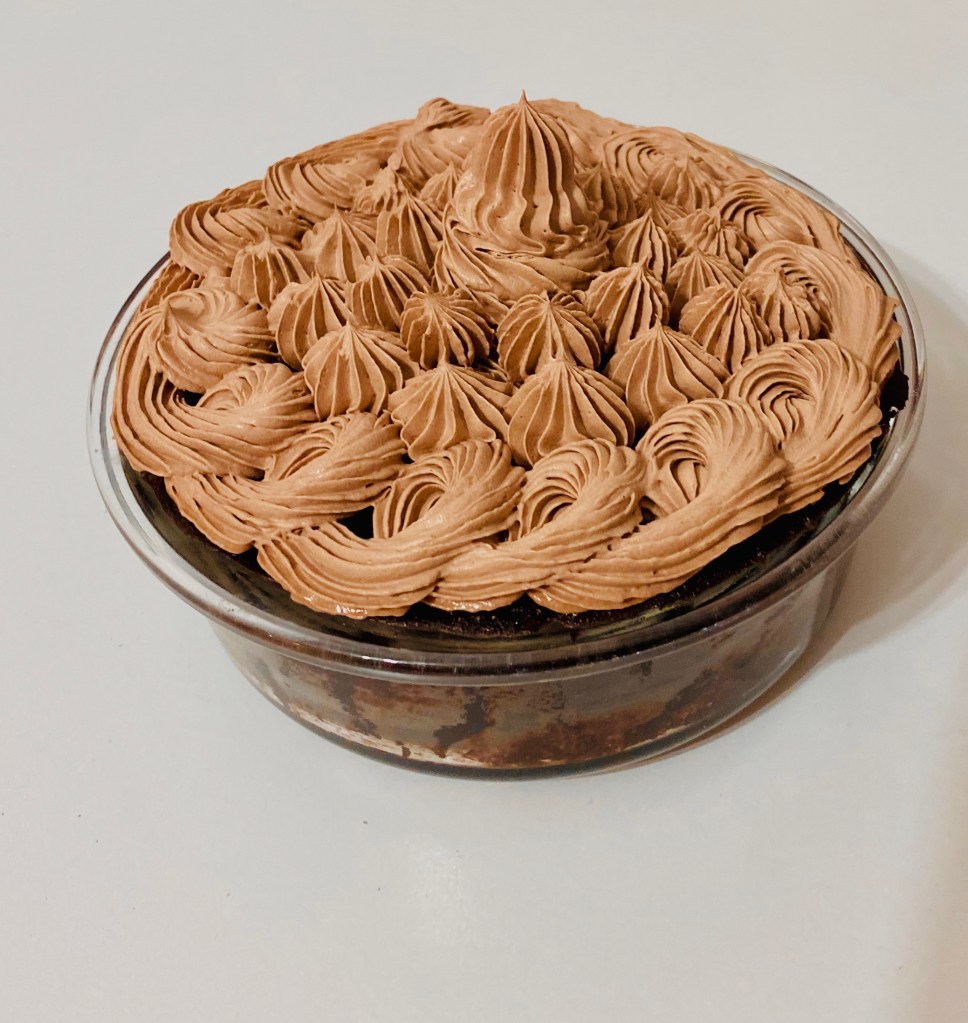
Chocolate frosting
Ingredients
• 1/4 cups heavy cream/whipping cream
• 2-3 tsp unsweetened cocoa powder
• 2-3 tbsp powdered sugar(up to taste)
• 2 tbsp milk
• ½ tsp vanilla extract
Method
1. In the bowl of a mixer place heavy cream, cocoa powder,powdered sugar, milk, and vanilla extract.
2. Stir to combine gently, then whip on high speed until the mixture is whipped fully, thick and creamy and when the whip attachment is pulled out of the frosting it forms a stiff peak (but do not overmix, it will become dry. If you do over whip it, just add a couple of tablespoons heavy cream and mix it in to smooth it out)
3. Place the frosting in a piping bag with a star shaped tip to pipe the frosting, or spread it on with a firm spatula.
Let’s start a wonderful journey of sourdough starter ………….
You can make your own starter normally in 7days (but its good if you use your starter once it became mature enough, for a good result bread or loaf).
lets talk about how prepare starter(Levain/wild yeast)
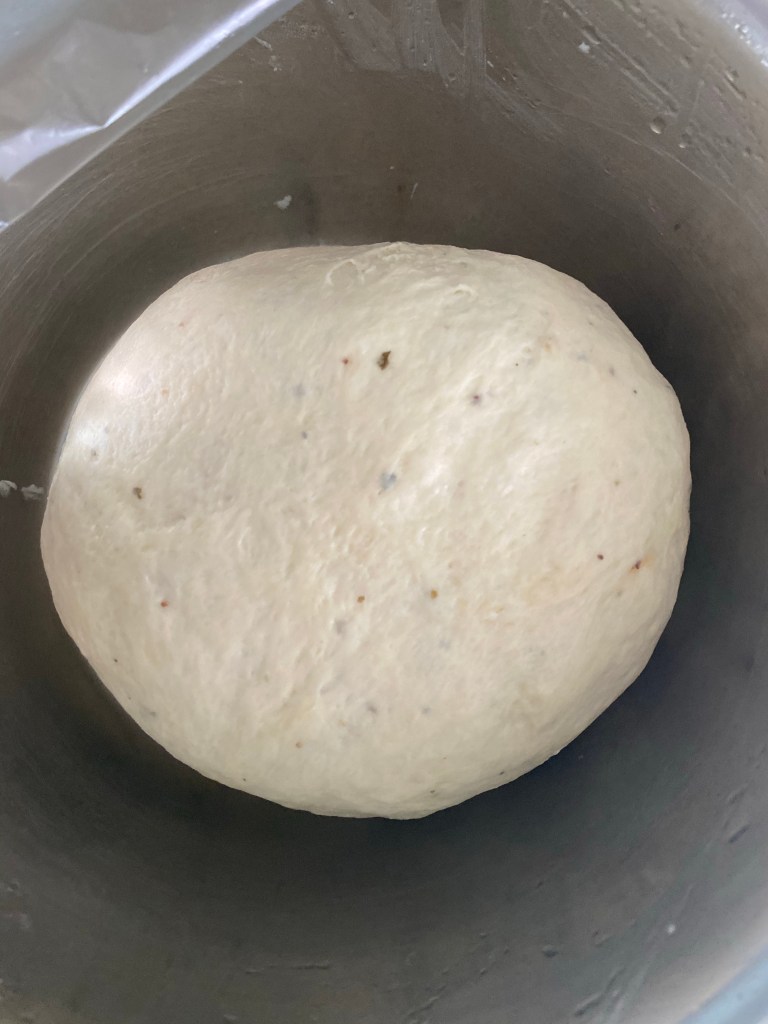
Day 1:
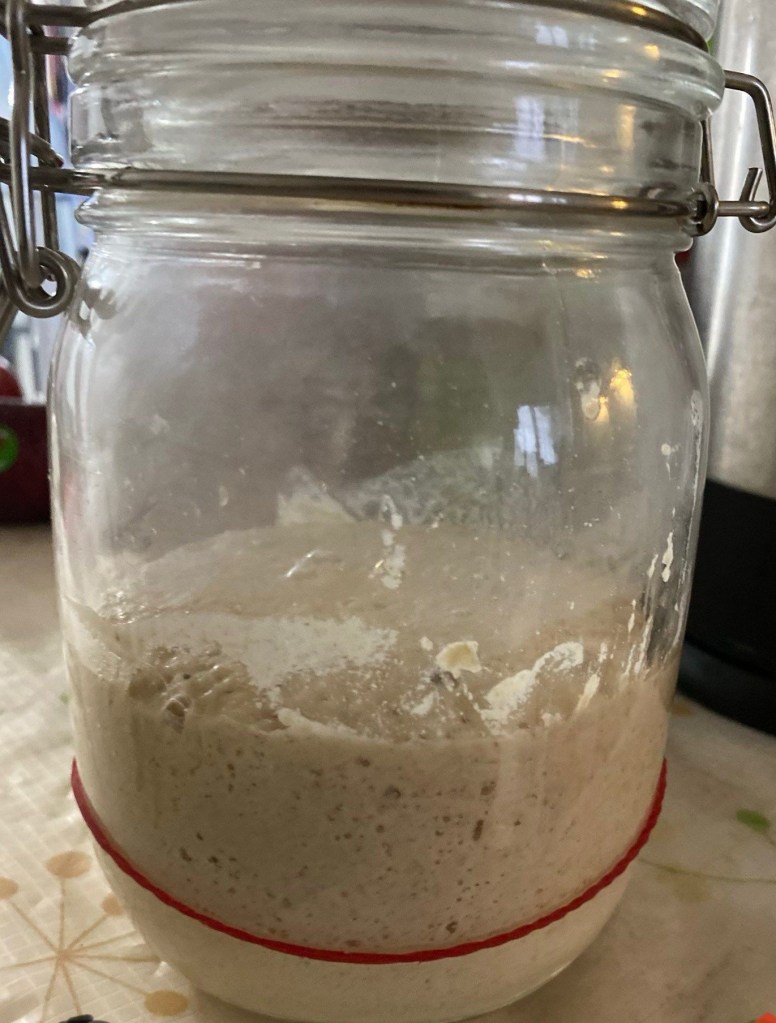
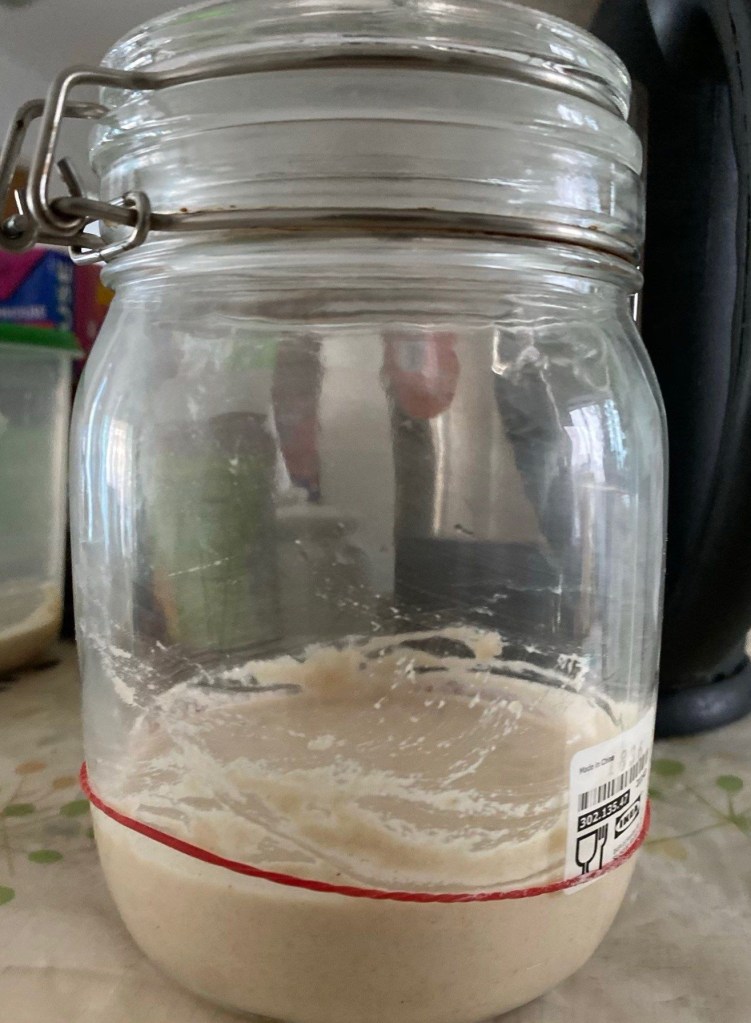
you mix equal amount of flour and water (started with a small amount of 40g flour and 40g water)into a batter in wide open jar or bottle and let them sit at room temperature. Cover with plastic wrap or a lid, and let it rest in a warm spot for 24 hours.
Day 1 (8hrs after mix the flour and water,the rubber band mark was the initial stage of the starter)
Day 2:
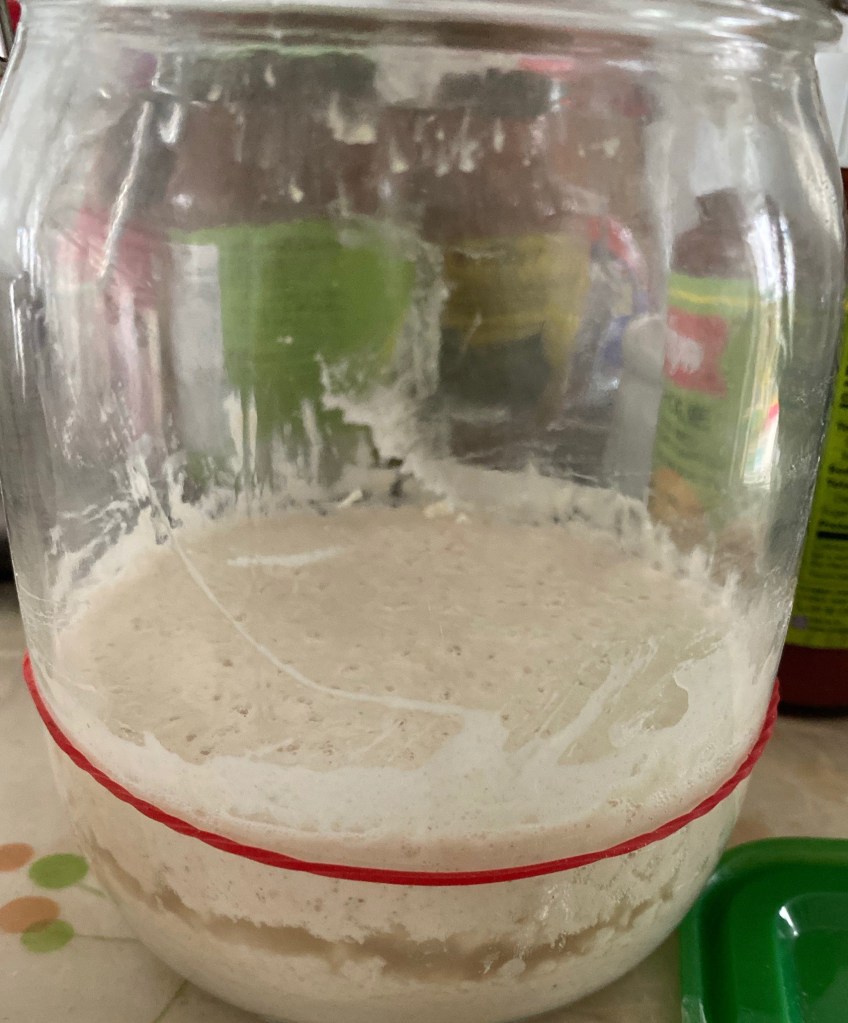
If you see small bubbles have appeared on the surface, bubbles indicate fermentation.Discard some of your batter and fed them again equal quantity of flour and water .let it rest about 12hrs
Day 2 just after fed
Hooch
Note: During this process, and even after your starter has been established, a dark liquid might appear on the starter . This liquid is called hooch and is an indication that your starter needs to be fed(hungry) .Any time you see this liquid, it’s best to pour it off, along with any discolored starter present. This stage your starter have stinky ,alcoholic smell.No need to worry it’s natural.keep going your feeding
Hooch
Day 3
To beginning of day 3 remove and discard approximately half of your starter from the jar with a spatula .(The texture will be very stretchy)
Note :Day 1,2,3 you can see a small ,or vigorous rise of your starter.(fee like your starter is dead ,but don’t worry it’s normal for this process )
Day 3
Day 4,5,6
At this stage day 4,5 you may or may not find and action happening in your starter.But nothing to worry keep on your feeding.
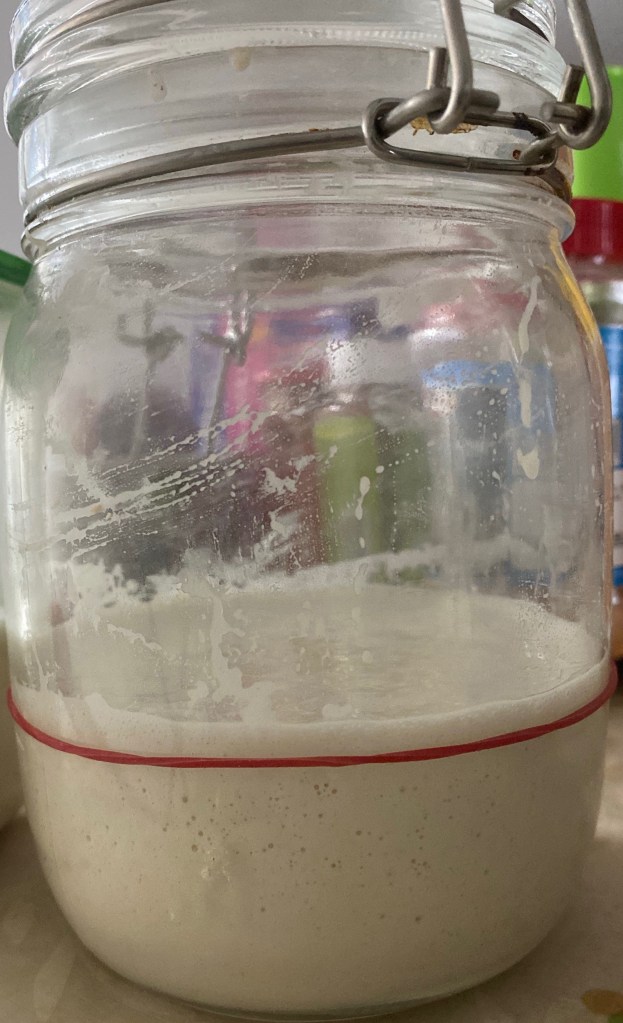
Remove and discard half of the starter, and feed .Continue the process every 12hrs intervals.You can change the feeding ration now 1:2:2(starter:flour:water)or 1:4:4
Day 4,5&6(not much activity happen)
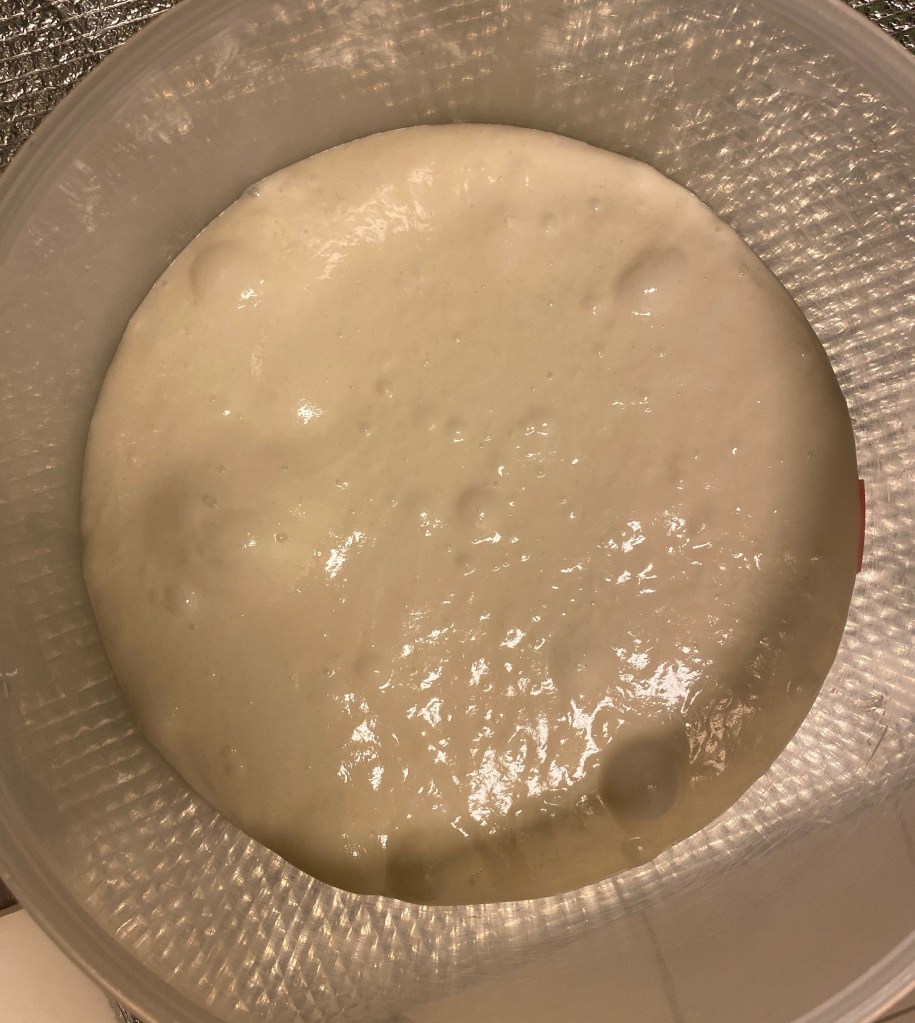
Day 7
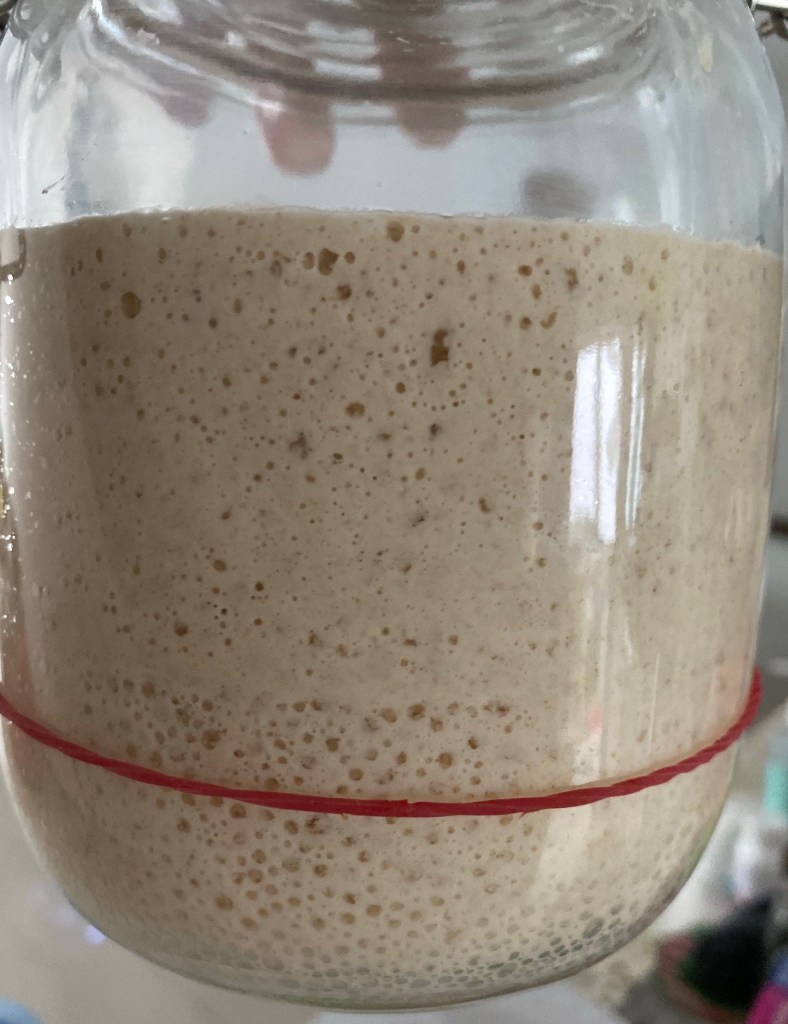
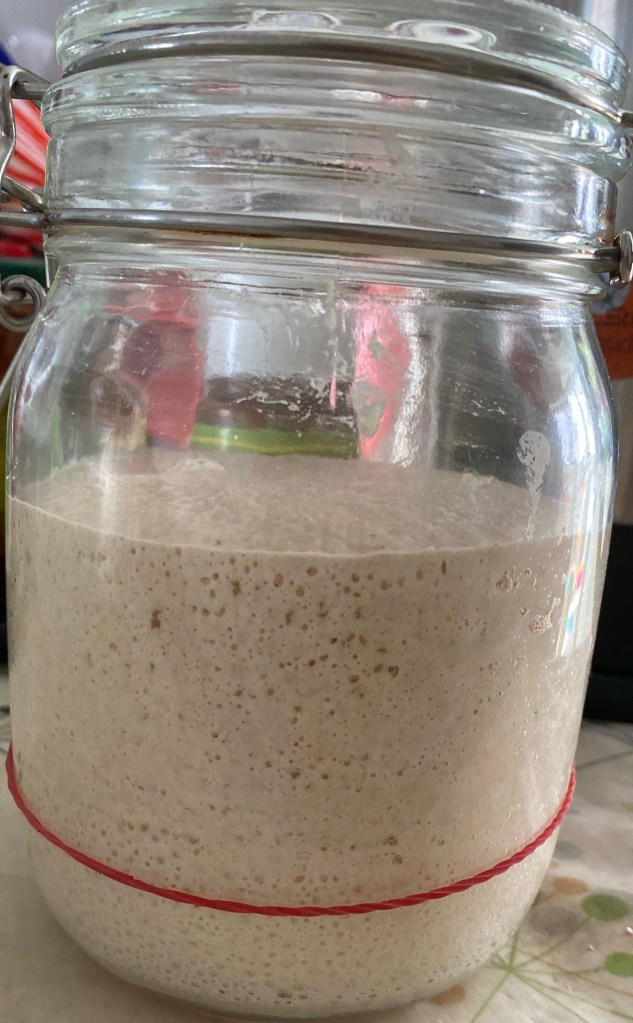
By now, your sourdough starter should have doubled in size with in 2-4 hrs (may be take more time),once the starter reach its peak it will start deflate slowly.(this mean your starter hungry again need to feed )when it reaches its peak you should see plenty of bubbles, both large and small.Day 7 you can perform a float test for your starter to make sure it is ready to go for baking(some times even if starter pass the test ,may be not strong enough to rise your bread,so wait few more days)
Day 7(double and and triple the size within 3-4hrs,after fed)
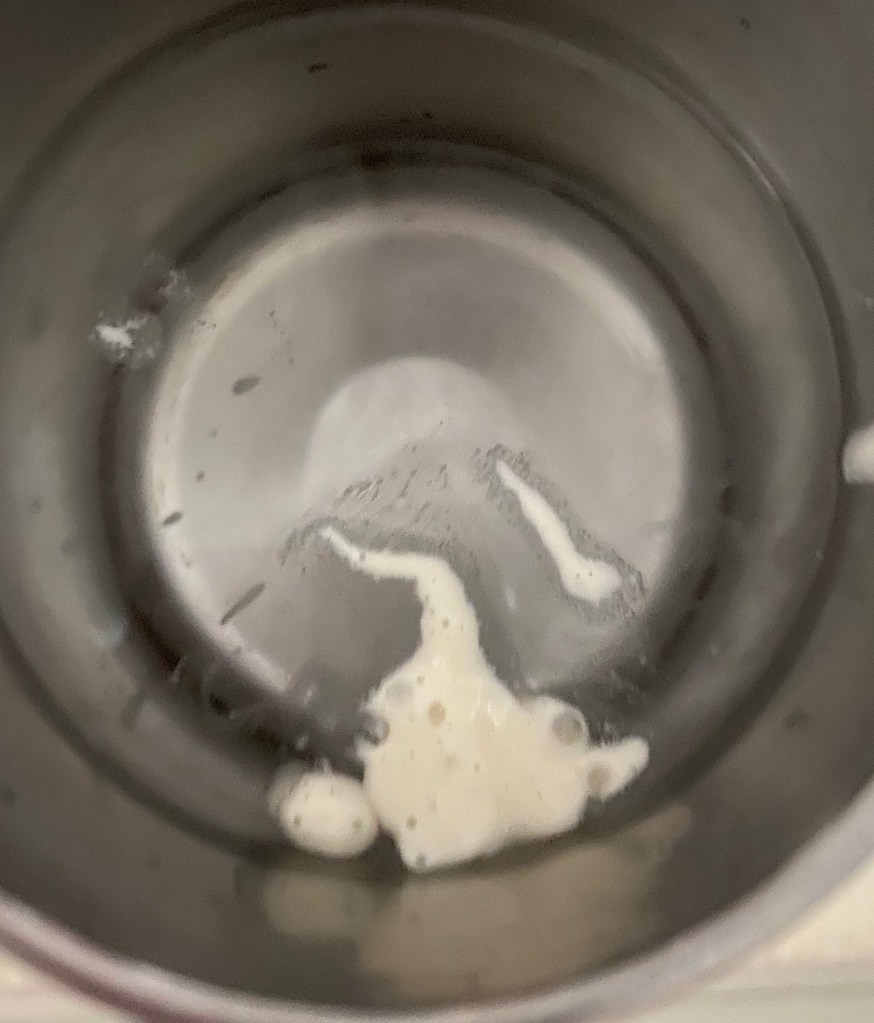
Float test
Drop a small amount of starter into a glass of room-temperature water. If it floats the starter passes the test,if it sink ,you either need to let the starter sit longer to develop more bubbles, or feed it again and let it sit until it passes the float test
Float test
Note: If your starter is not strong, your bread will not rise.
Day 8,9…
Over the next few days, you’ll need to feed the yeast and bacteria by pouring off some of the culture and adding fresh flour and water. You’ll know it’s ready to use to make bread when the culture becomes very bubbly within just a few hours of feeding, and when it smells sour but fresh.Continue until your start became stronger at-least take 10 -12 days .I made my first bread once the starter become 21 days old.Once you have a starter, you never have to make one again.
Storage
I keep mine in the fridge, and I feed it roughly once a week. When I want to make a loaf of bread, I take it out a few days ahead and feed it once a day to strengthen it again.
Bread making process
There is few steps you have to follow while making the sourdough bread,explained bellow
Step 1:The Autolyse
Mix the starter with the flour and water, let it sit for at least 30 minutes or for up to four hours. During this time, the flour absorbs the water and becomes fully hydrated, which helps gluten formation during the next step. After this resting step, mix in the salt. Salt is necessary for a flavorful bread, but can inhibit the activity during the autolyse step.
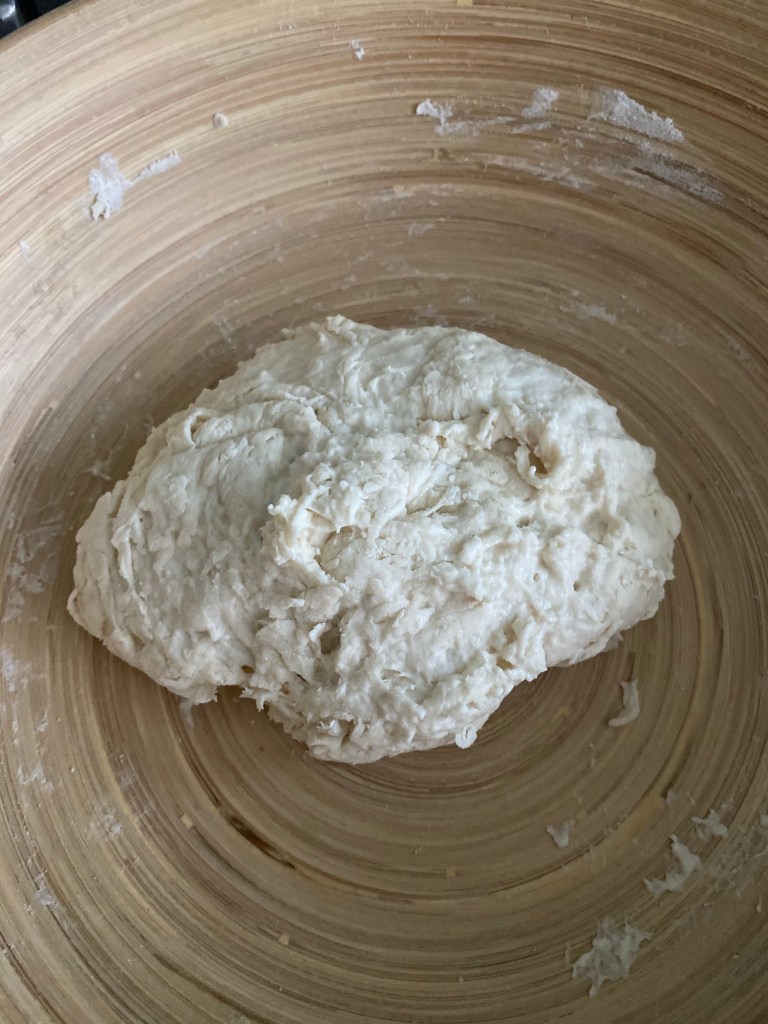
Step 2:Stretching and folding
After the autolyse, begin folding the dough by grabbing some of the dough from the side, stretching it up, and then folding it over on top of the dough. Do this a few times around the bowl, then let the dough rest about 30 -45 minutes before doing it again. After a few rounds of this(3to4 rounds)the dough will go from shaggy and clumpy to smooth and stretchy. Cover the bowl with plastic wrap or a clean kitchen towel. (this stretch and fold include the bulk fermentation process this will go up to 4hr or slight may vary depending on the kitchen temp).
After 1st S&FAfter 4th S&F
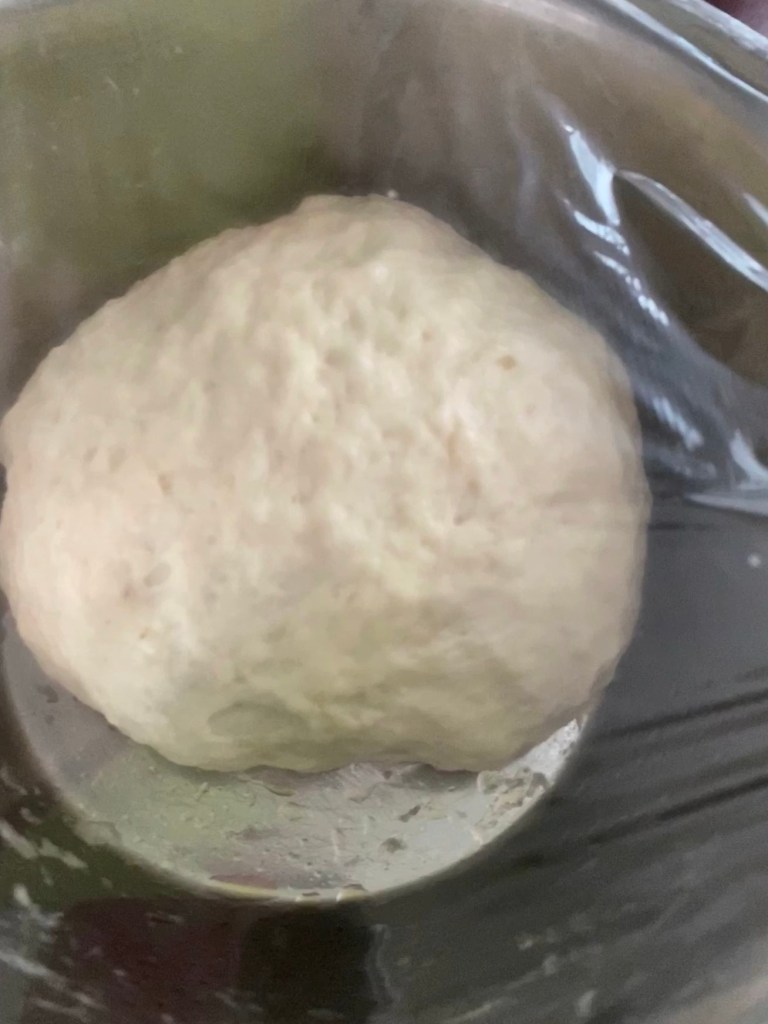
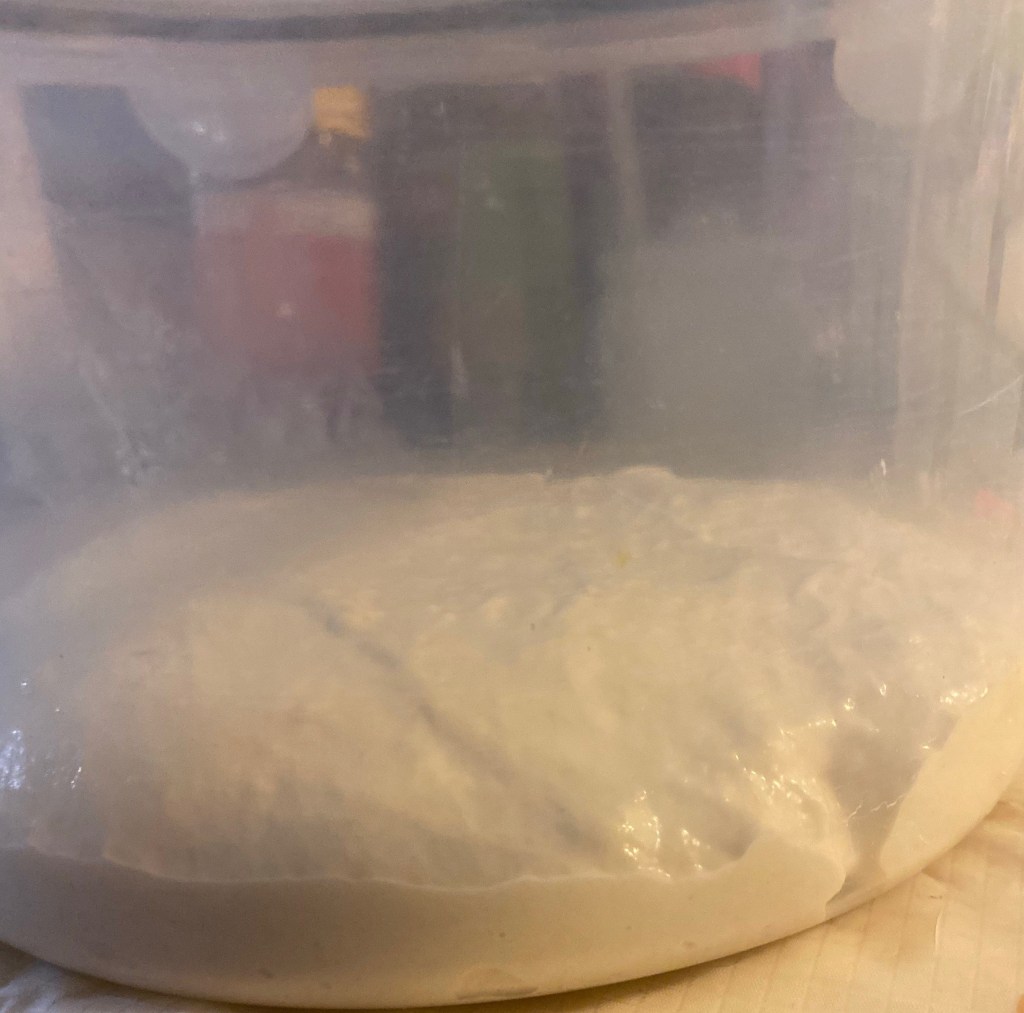
Step 3:Bulk fermentation
This is one of the important stage in your bread making process.After the stretch and fold let the dough rest until increase its volumes about 50-60%(better keep the dough in a glass or plastic rectangular container so you can mark ,you can even see how much it grow it’s volume).This dough won’t double in size the way regular, non-sourdough breads will,it should just look larger than it did when you started.
Bulk fermentation stageAfter bulk fermentation
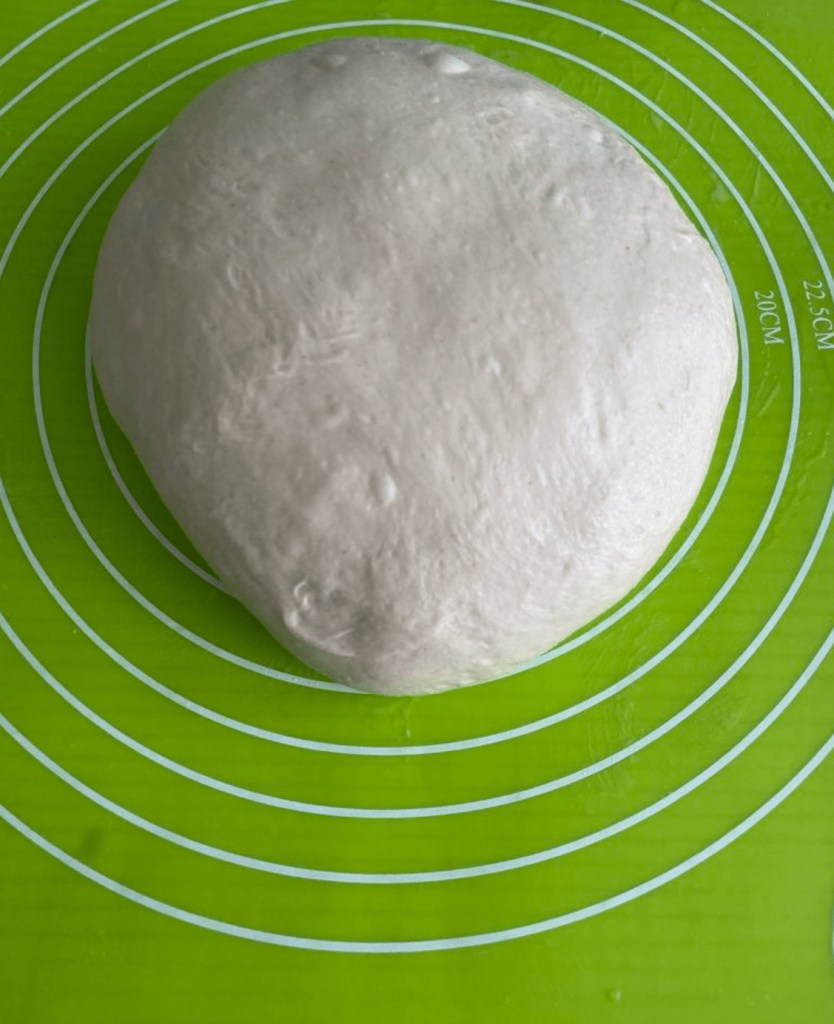
Step 4:Preshaping
Sprinkle some flour on a work surface and turn the dough out on top. Work gently to avoid deflating the dough.Take each sides of the dough ,fold and form it into a loosely round shape with just enough tension on the outside.
Preshaping gives an extra chance to add strength to the dough.Use a bench knife for this process (easy to handle the dough ).let it rest for 20-30 mint(bench rest).
After Preshaping
Step 5:Final shaping
Shape them into rounds by slipping your bench knife or pastry scraper under the edge of the dough and then scraping it around curve of the dough, like turning left when driving. Do this a few times to build the surface tension in the dough
Step 6:Proofing
Make ready your proofing basked layered with flour (banneton) Dust the tops and sides of the shaped loaves generously with flour. Place them into the proofing baskets upside down, so the seams from shaping are on top.
Cover the baskets loosely with plastic wrap, or place them inside clean plastic bags. Retard this banneton (proofing basket)in the fridge for overnight proofing
After proofing &scoring
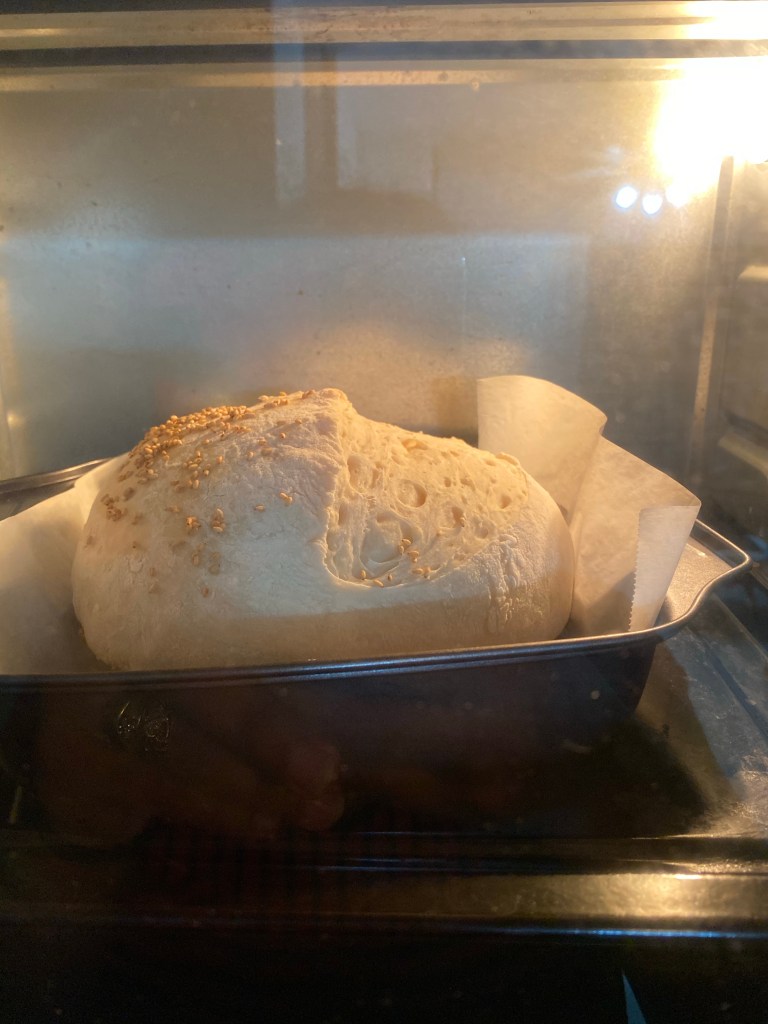
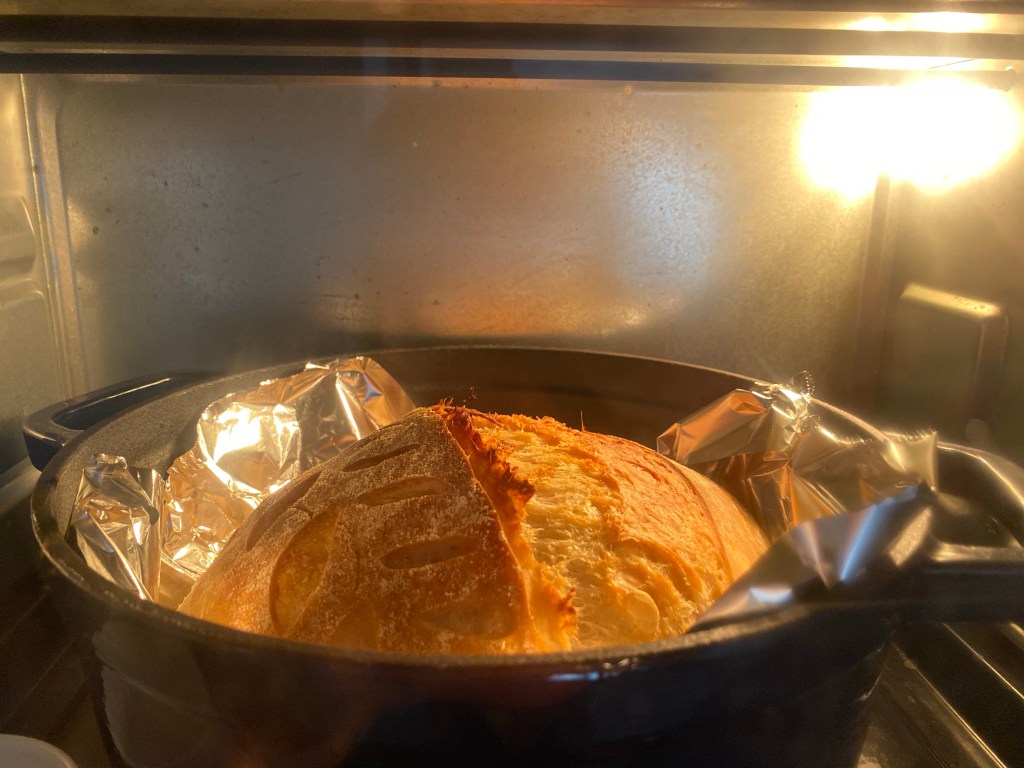
Step 7:Baking
Place two Dutch ovens or other heavy-bottomed pots with lids in the oven, and heat to 250•c for preheat about 50-60mint.Once this ready ,take out the dough from fridge and use a lame, sharp knife, quickly score the surface of the loaves. And transfer this to the Dutch oven.Bake the loaf 230•c for 20-25 min with Dutch oven lid on and 230•c without loud for another 20-25 mint .At this point, the loaf should have “sprung” up, have a dry surface, and be just beginning to show golden color.
To get good oven spring spray some water on the dough before put the dough into the oven.
Oven spring
In bread baking, the final burst of rising just after a loaf is put in the oven and before the crust hardens. When the dough hits the hot oven, it can puff up to as much as a third of its size in a matter of a few minutes.
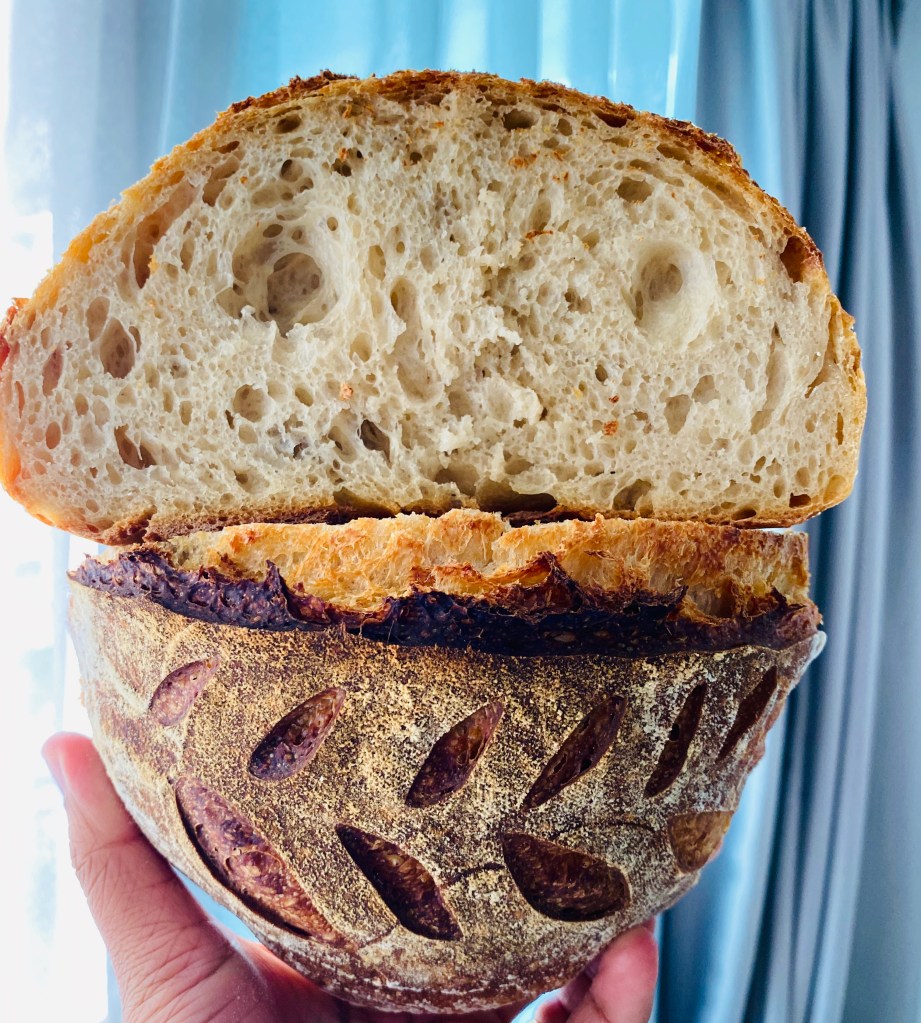
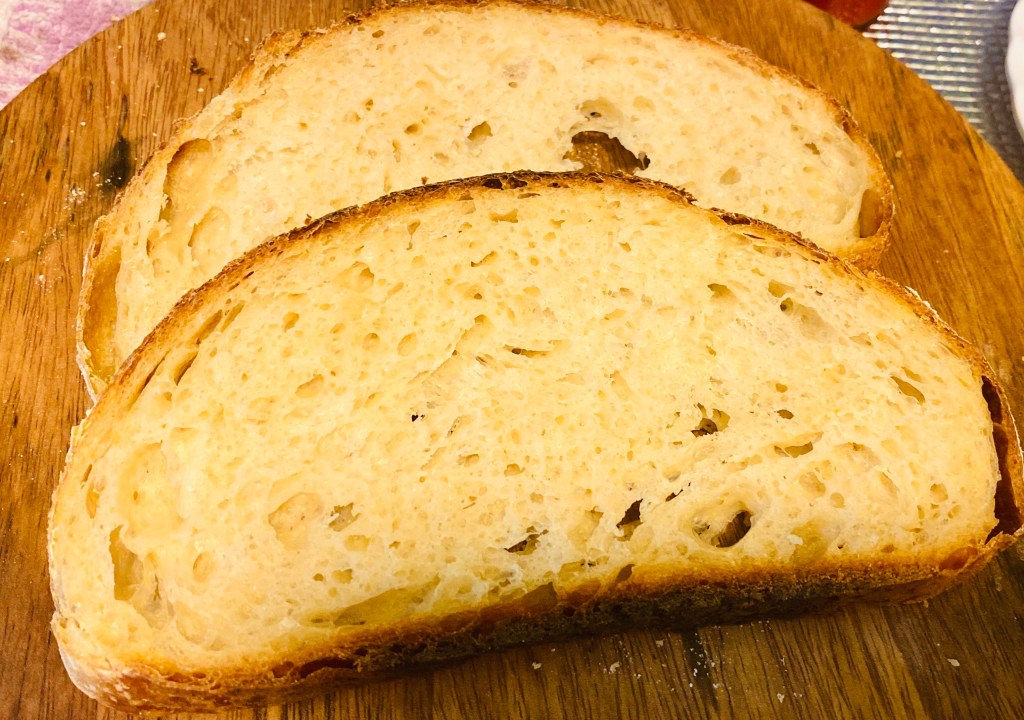
Step 8:Final stage
Once the baking done left the loaf in the oven for another 5-7mint (oven off).Then take out from the oven ,lift the loaf out of the pots (hold the parchment paper from the sides to pull out from the Dutch oven).Transfer them to wire racks to cool completely. Wait until they have cooled to room temperature before slicing(2-3hrs).If you cut the bread before it completely cool down ,the bread may became chewy.
• Step 1:Peel and chop the mangoes,blend and takeout purée out of it.Add condensed milk into the purée and whisk until it combine fully.keep it aside.
• Step 2:Whip the cream using a hand mixer till soft peaks form. You can use a stand mixer as well for the purpose. Add mango puree in the whipped cream. Whisk using the hand blender or sptaula for 1 – 2 minutes or until well combined. Taste it ,if required sweet add condensed milk at this point
• Step 3:Pour the ice cream into a freezer friendly container with a lid and keep baking paper on the top of the ice cream just touch on the surface.Freeze for 2-3 hours or until set halfway.once it ready take out from the freezer blend the(Note: halfway blending will help to give a smooth and creamy texture to your ice cream)ice cream one more time and freez it again for 5-6 hrs (overnight)until it set again.Your mango ice cream now ready to serve ,then scoop and serve.
1.flour onto a clean work surface and use your fist to make a well in the center.Break the eggs into the well. Add the oil and a pinch of salt to the well. Gradually mix the egg mixture into the flour using the fingers of one hand, bringing the ingredients together into a firm dough. If the dough feels too dry, add a few drops of water; if the dough feels too wet, add a little more flour.Let the dough rest for 30 min .Now add sourdough discard to the dough (if not using the discard,please omit this step).
2.Knead the pasta dough until it’s smooth, 2 to 5 mint.Lightly massage it with a touch of olive oil, tuck the dough in a resealable plastic bag, and let it rest at room temperature for at least 30 minutes. The pasta will be much more elastic after resting than it was before.Divide the dough into small balls .
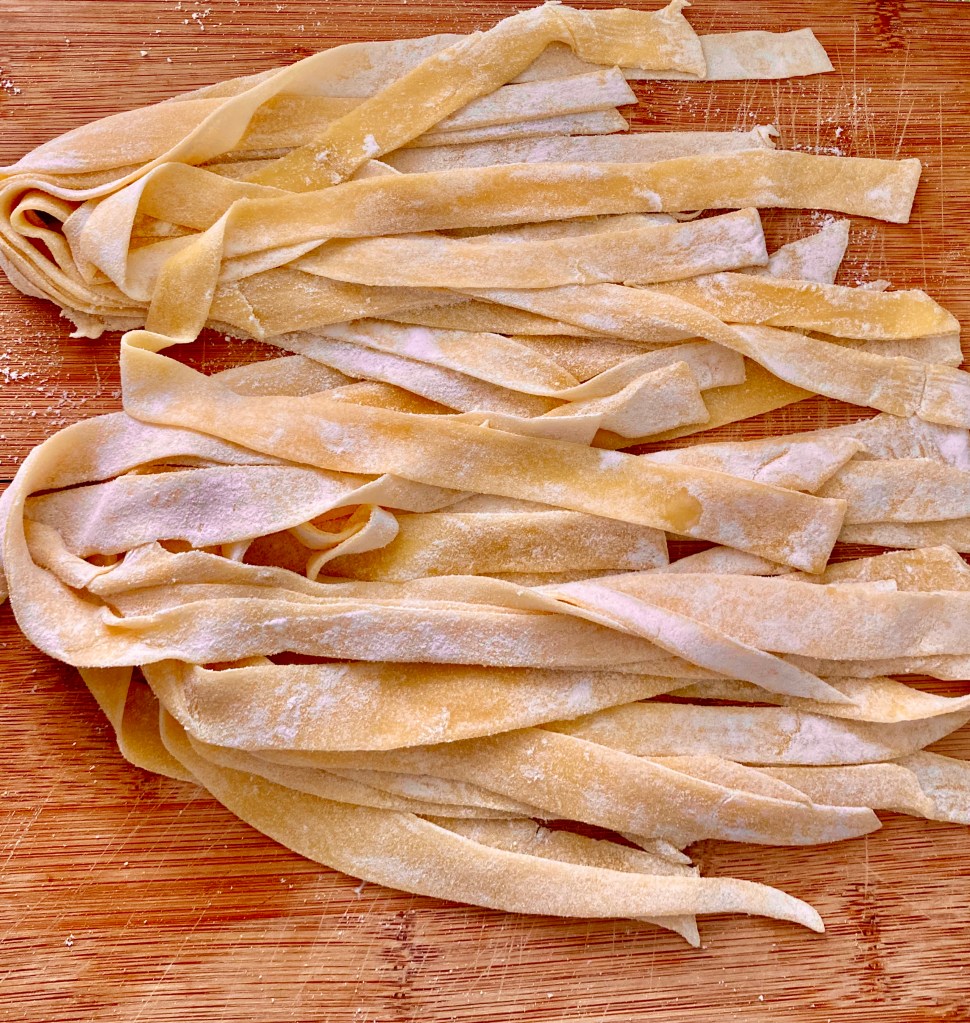
3.Roll the pasta ball with Woden roll . lightly floured surface, roll or fold one side of the sheet of dough loosely towards the center of the sheet, then repeat with the other side so that they almost meet in the middle. Gently fold one side on top of the other, but do not press down on the fold. Cut the dough into thin slices with a sharp knife, slicing through the folded dough quickly and deftly in a single motion. Hang the pasta to dry a little before cooking.
4. You need 3-4cup of water for this.Bring the salted water to a boil in a sauce pan .Throw the pasta into the water. Stir the pasta immediately after you add it to the water and perhaps once again. Stir the pasta only once or twice. If you’ve used enough water and you stir the pasta as it goes in, it shouldn’t stick each other.
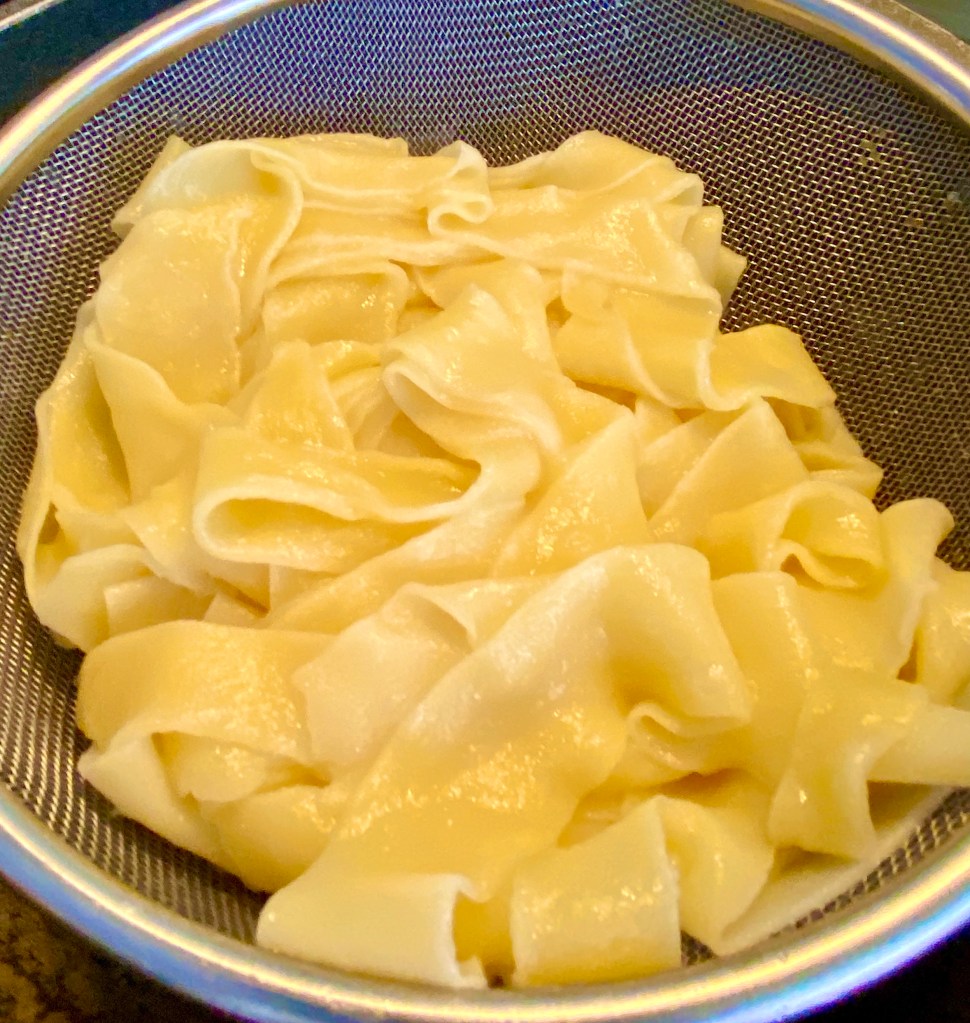
5.Once it done (5/7 min)take out and drain it and keep it aside.
Pasta
Pasta sauce
Ingredients
2-3 tablespoons olive oil
1 medium onion finely diced
3 cloves garlic minced
2 teaspoons dried basil
2-3 tbs red chilli powder
1/2 teaspoon salt
1/2 teaspoon granulated sugar
1-2 tbs butter(unsalted)
1 1/2 cup crushed tomatoes
1/4 cup water
Method
1.Heat the olive oil over high heat until it shimmers. Saute the onions, stirring frequently, until they soften and shine, about three minutes. Once onion cook,add the garlic. Stir to combine.Cook an additional two minutes. Add the basil, red chilli powder, salt, and sugar. Stir to combine. Add the butter. Stir, cook for about a minute
2.Add 1 1/2 cup of crushed tomatoes. Sauté it continuously in a low heat.Add water to this ,If the sauce seems too thick, add additional water.
3.Allow sauce to simmer for 10 minutes to up to one hour. If simmering for a longer, stir the sauce occasionally and add additional water as needed to keep the sauce at the correct consistency.Now your sauce is ready to use.
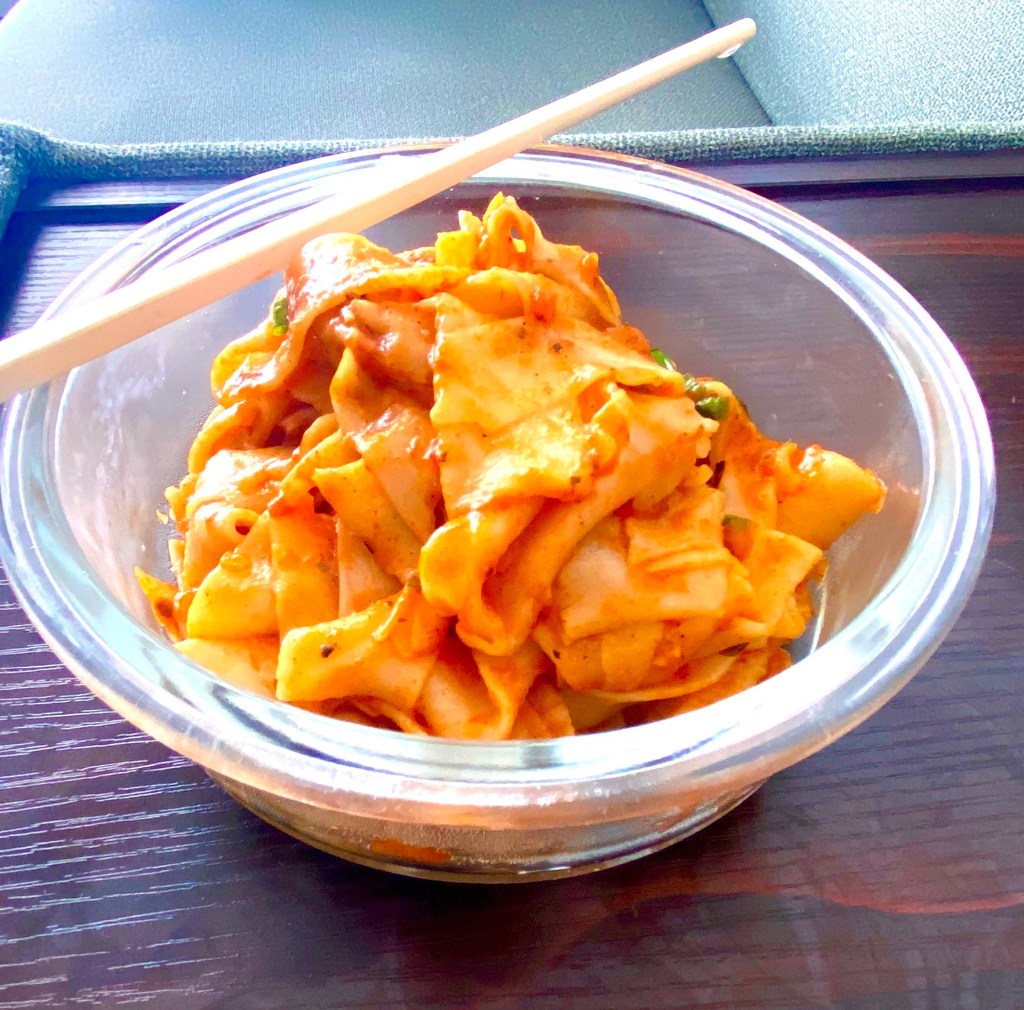
4.In the sauce ,add your drained pasta and stir it for 4-5 mint.
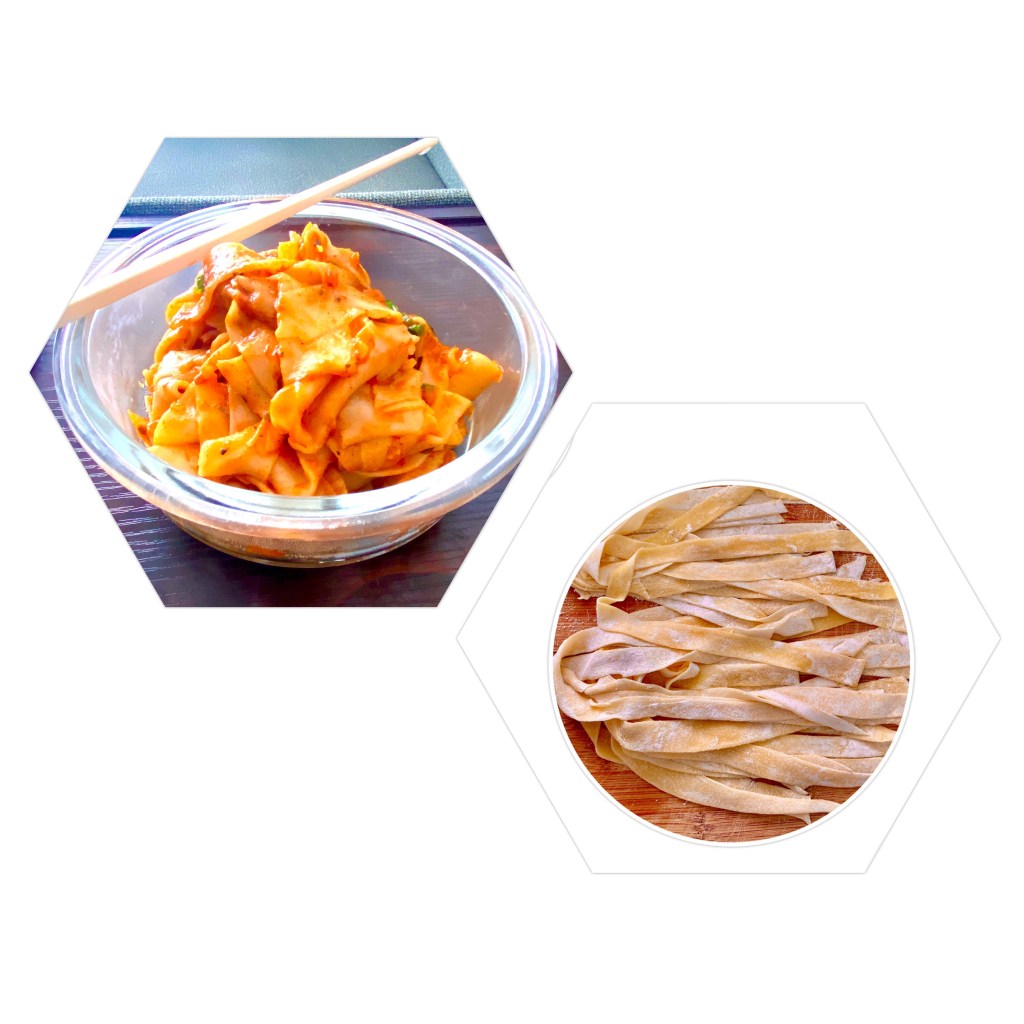
Your home made pasta is ready to serve.
After cook(drain out the water)Pasta with red sauce
• Add fresh mango to food processor or blender and puree until smooth,strain and set aside.
• Place mint leaves, piece of lemons ,lime juice, simple syrup or honey in the shaker. Use a muddler to gently muddle the mint leaves, but don’t muddle too much or you’ll break up the leaves.
• Add the mango puree and mix until combined. Fill two glasses 2/3 of the way full with the mango mixture and ice.
• Top with water /club soda. Add extra mint leaves, mango cubes and lime for garnish.
• Place the flour, sugar, yeast, butter and salt in a large bowl and whisk together until combined. Add the milk /water and stir together until a stiff dough forms.
• While the dough is chilling, prepare the butter. Arrange the sticks of butter horizontally on a piece of plastic wrap. Cover the butter with another piece of plastic wrap. Pound and roll out on both sides until the butter forms a nice 8 by 5 inch rectangle. Cover with plastic wrap and refrigerate until ready to use.
• After 1 hour take out the dough from the fridge and place the butter directly in the center of the dough and fold the dough as you would a letter, bottom third of dough over butter, then top third down over the dough. Then roll the dough into a long rectangle shape.
• Fold it into thirds (like a letter), turn 90 degrees, and repeat 4 to 6 more times, or until the dough has large streaks of butter in it but it is smooth and flat.
Note :At any point the butter starts to feel soft, chill it in the refrigerator or freezer until stiff .
• Wrap tightly and chill for 1 more hour, then divide the dough in half and roll each portion out to a thickness of about 1/7 inch, in a long rectangle shape .
• Cut the dough into Long triangles and make small cut on the wide end of each triangle with about a 1/2-inch cut, then roll from the wide end to the pointed end, tucking the point under the croissant.
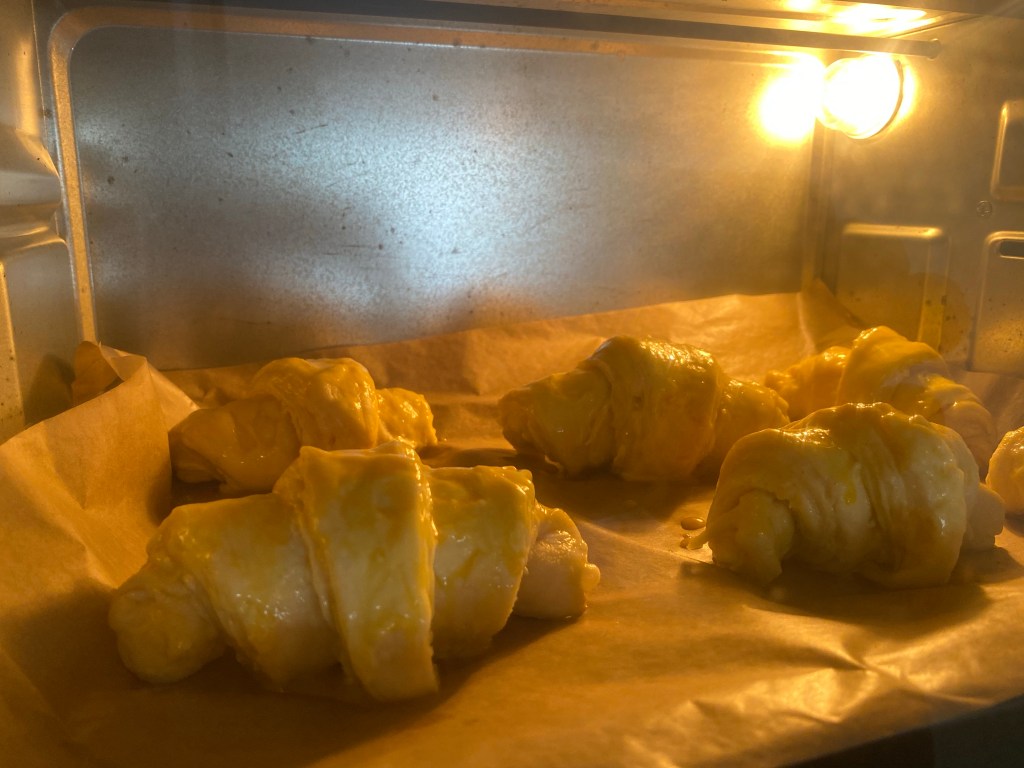
• Place on a parchment-sheet, cover loosely with plastic wrap, and allow to proof until doubled in size (1 to 2 hours).
• Preheat the oven to 200•C and gently brush the croissants with egg wash/milk.Bake for 15 to 20 minutes, or until puffed, golden brown, and flaky.
1.cup lukewarm water in a large mixing bowl. Add yeast and sugar. Stir to dissolve. Add all flour and whisk together . Add salt, olive oil and nearly all remaining ingredients into the bowl.Mix well and make a smooth and soft dough out of it. Clean the mixing bowl and put dough back in it. Cover bowl tightly with plastic wrap or cover with a towel .let the dough rest until it becomes double in size ,take about 45-60 mint.
2.At this point preheat your oven at 220•c .Place a baking tray upside down on the bottom shelf of your oven.
3.once your dough double in size , gently deflate the dough and turn it out onto a lightly floured work surface. Make small balls out of it.Use a rolling pin ,roll small roties.
4. Carefully lift the roties and place quickly on hot baking tray.After 2-3 minutes the dough should be nicely puffed. Turn over with tongs or spatula and bake 1 minute more. The pita should be pale, with only a few brown speckles. Transfer warm pita to a napkin-lined basket and cover so bread stays soft. Repeat with the rest of the dough balls.
5. If you are using stovetop keep a cast iron skillet over medium-high heat until a few bead of water sizzle immediately on contact. Drizzle a little oil in the pan and wipe off the excess.Lay a rolled-out pita on the skillet and bake for 30 seconds, until you see bubbles starting to form. Flip and cook for 1-2 minutes on the other side, until large toasted spots appear on the underside. Flip again and cook another 1-2 minutes to toast the other side. The pita should start to puff up during this time; if it doesn’t or if only small pockets form, try pressing the surface of the pita gently with a clean towel. Keep cooked pitas covered with a clean kitchen towel while cooking remaining pitas.
Falafel
Ingredients
• cup dried chickpeas, soaked overnight
• 1/2 cup onion, roughly chopped
• 1 cup parsley(roughly chopped )
• 1 cup cilantro(roughly chopped )
• 1 small green chilli
• 3 garlic cloves
• 1 tsp cumin
• 1 tsp salt
• 1/2 tsp cardamom
• 1/4 tsp black pepper
• 2 tbsp chickpea flour/all purpose flour
• 1/2 tsp baking soda
Method
1.Soak your dried chickpeas.Overnight or for at least 8-12 hours.Then drain and rinse them.
2.Add all the ingredients to a food processor. Add the chickpeas, chopped onion, parsley, cilantro, garlic, green chilli and spices to a herbs and pepper.Pulse the food processor but do not blend completely. The final mixture should resemble coarse sand.
3.Transfer the mixture to a bowl. Then add the corn starch (all purpose flour/chickpea flour) and baking soda, stir it together until it’s fully combined and cover with plastic wrap or a lid.
4.Place the bowl in the fridge. Chill the falafel mixture for 30 minutes to 1 hour.
5.Use hand, or a scooper to make round balls or flatter patty shapes.
6.Either you can bake or deep fry in the oil
7.For barking :preheat your oven at 220•c ,and bake at 200•c for 20-25 mint (depends on your oven temperature) Place the falafel on the baking sheet, lightly spray or brush the top side with oil and bake for 25-30 minutes, flipping halfway through. You can also bake them on parchment paper or a silicone mat without any oil. They’ll just be slightly less crispy and golden.
8.For deep fry:Heat up a skillet /wok/pan with oil in medium high flame ,once the oil gently place the falafel in the pan and cook each side for 2-3 minutes or until golden, then transfer to a paper towel-lined plate.
• Pour sesame seeds into the food processor. Slowly drizzle in the oil while the processor is running, blending for 2 minutes. Check for consistency. The goal is a thick, yet pourable texture. Add more oil and blend until desired consistency.Add salt to taste.
Assemble the falafel pita sandwich
Cut about 1 inch off top of each pita, forming a pocket. Add 2 falafel to each pita and divide lettuce, tomato, cucumber, red onion and tahini sauce among pitas.